
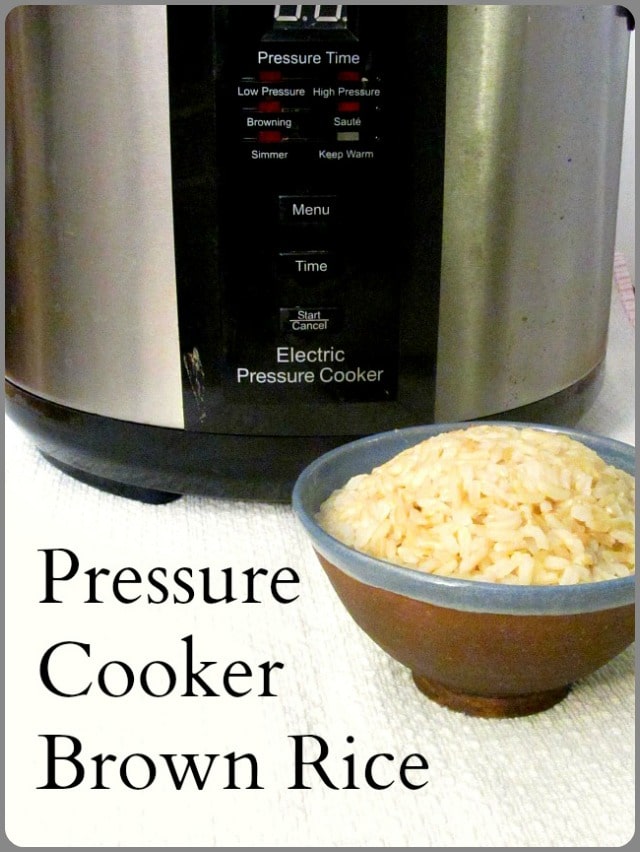
Pressure Cooker Brown Rice
Use the pressure cooker for brown rice – half an hour, start to finish!
I may have mentioned, two or three (or fifty nine) times, that I have a very small kitchen, here. This building was one of the many that sprang up abruptly in the late ’40s to house returning veterans, and while the construction is excellent, some of the design is not well thought out.
The worst is my teeny, tiny “efficiency” kitchen. The concept was that it was easier for a woman to work without having to move more than a step or two from sink to stove to counter to refrigerator. And after all, she would use all these modern frozen dinners and boxed mixes! It wasn’t as if she would ever really need much counter space… or more than a saucepan.
But I cook.
So – there was this electric pressure cooker. It’s a long story, but I was given it… and I saw people doing interesting things with one, and it seemed worth trying. But I was stashing it in the closet, and setting it up on the dining table, and that didn’t exactly encourage use. Well – what could I move to make room?
I have a small stand that held the coffeepot and the rice cooker. The two appliances I used every single day. Rice. Of course I could still cook brown rice in a saucepan, I had done so for years, but it was so much easier to set it and forget it… and I loved the timer so that if I got home late, it didn’t have to take an hour before we could eat…

What about cooking brown rice in the pressure cooker? So I did that, following the directions that came with the pot, and we thought it was awful. Soggy and overcooked. Then I tried a few other (and remarkably different) measurements and timings I found from other sources, and still didn’t like it. I was about to give up…
But then I remembered my old Diet for a Small Planet cookbook – and that Frances Moore Lappé had raved about using a pressure cooker to cook brown rice and beans – putting the rice in a pot inserted in the cooker. Tried that – better, not as soggy, but still not quite there… And I looked at Hip Pressure Cooking (which I find to be a very useful general source) and tried their trick of releasing pressure after ten minutes. Still overcooked…. So – shorten the time, Anne!
I did – and I’ve been making it this way a couple of times a week since early last summer. It takes half the time of the rice cooker. (And that includes time to come to pressure!) I’m sold.
The essential problem with rice or beans in a pressure cooker is that they break down and get starchy in the furiously boiling water – and then they foam and get soggy and gloppy, and you need too much water because there has to be water boiling to make steam to maintain pressure. The pot in pot method solves that, as you have clear water boiling into steam for pressure, and the food cooks in the correct amount of water. (I use the pot in pot for beans, too – I’ll write that up, one of these days.)
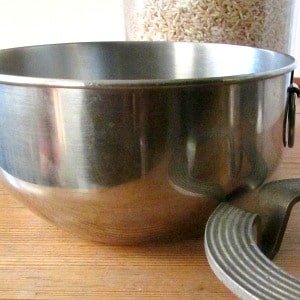
First, of course, you need the insert. The shape is a bit tricky, as it needs to be deeper than it is wide, and most bowls are the other way around, and handles get in the way. It also, of course, must be heatproof. I like stainless steel best, but was using Corningware casseroles for a while – I know people use Pyrex, too. (Not affiliated, yadda, yadda – they’re just kitchen standards in the American kitchen, and people know what I am talking about.) I was lucky – while I was fooling around with alternatives, a downsizing friend offered us a set of nesting stainless bowls – I grabbed them! They fit perfectly.
I have seen directions to place your insert on a trivet so the water can flow underneath it, in contact with the heated area. I did that originally, but have found that, with the shape and material of this bowl, it does not seem to matter. I would probably still do it if I were using the ceramic again, though – or even had a wider base.
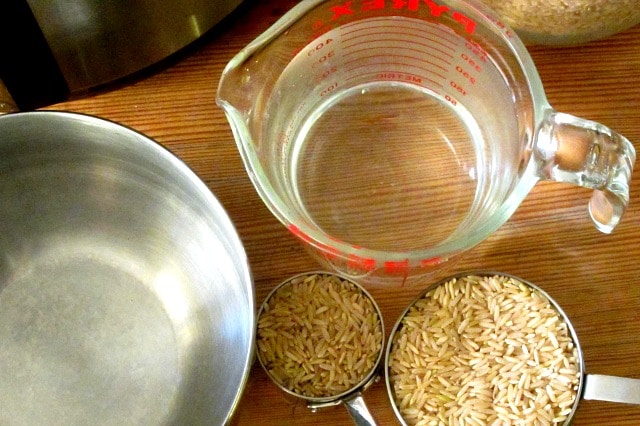
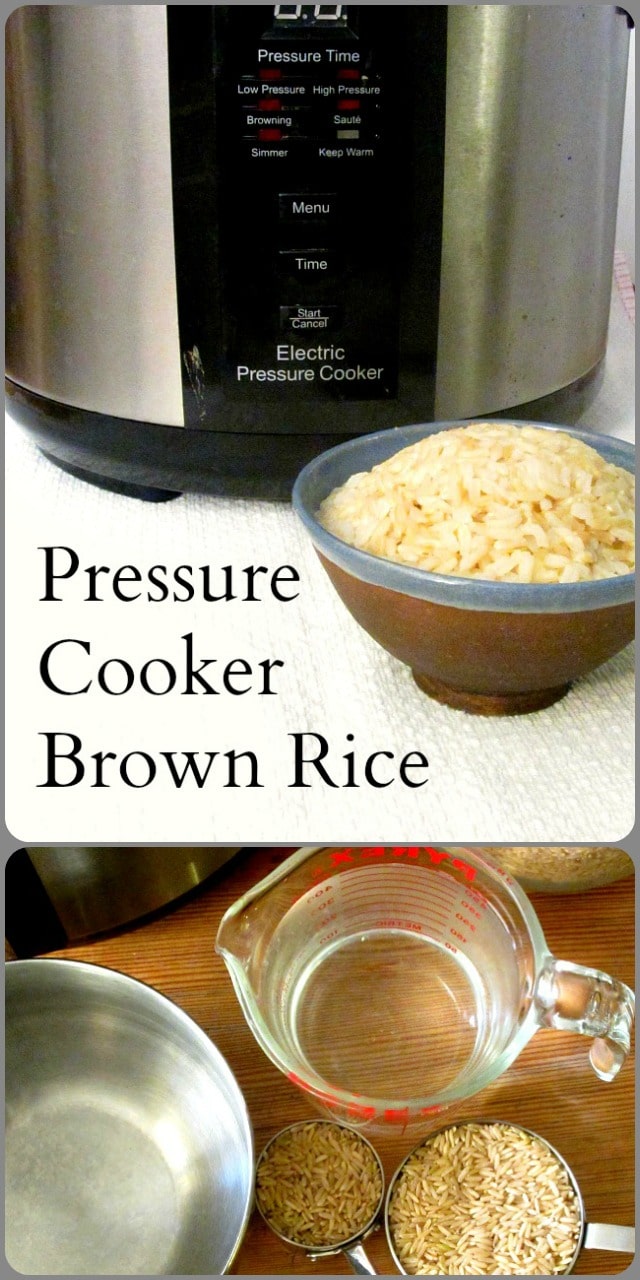
The basic recipe is one third of a cup of brown rice and one half cup of water in the insert per cup of cooked rice. I wrote this up as enough to make four cups of cooked rice, which will be a good amount for most families (and is the least I ever make – I like to have cooked rice on hand for later meals.)
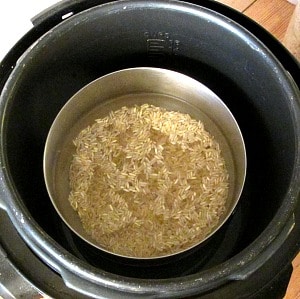
All this introduction, but the recipe itself is easy. Put a six cup insert into your pressure cooker. Place one and one third cups of brown rice in the insert. Pour two cups of water into the insert, with the rice. Pour at least a half cup (or a little more – you don’t need to measure this precisely) into the pressure cooker pot, around the extra insert pot you have added. (Some of that water ends up in the rice – the reason the proportions above look odd.)
Close the pressure cooker, and set the valve to closed. Set it to High pressure, and set the time to ten minutes. It will take, in my experience, something under ten minutes to come to pressure, and then cook for that ten minutes.
When it beeps, set a separate timer for another ten minutes, and leave the pressure to start coming down naturally. After ten minutes, use tongs or something long to release whatever pressure is left. Then open the pot.
If you don’t get to it at once, don’t worry – a minute or so won’t hurt anything. If you don’t get to it at all, and the pressure fully releases naturally, your rice will be a little soft and overcooked, but not burned or anything – it’s not that big a deal… Which makes this a good method if a child, or something on the stove is apt to claim your attention at the crucial moment!
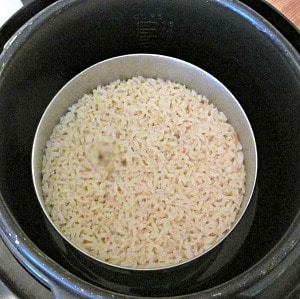
You can now serve it at once. I usually like to give it another minute or so to finish reabsorbing water – I find the texture is a little better – but that’s optional. Half an hour from pouring the rice in to spooning it out – pretty good for brown rice!
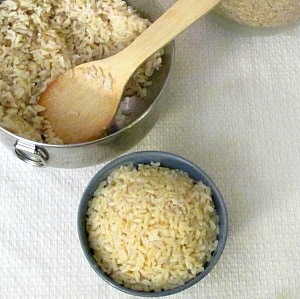
Now, I use an ordinary supermarket medium grain brown rice, and I’m getting the results I had with a rice cooker that had a setting for brown rice (and they’re hard to find…) Short grain rice comes out the same as well. I have not tried a good long grain rice, looking for fluffy dry grains – I never cooked that in the rice cooker, either, preferring a pilaf technique (and that’s not really our staple rice.) Let me know if you do try that, and what you think of it!
Pressure Cooker Brown Rice
Ingredients
Method
- Place a 6 cup heatproof insert pot in your electric pressure cooker.
- Put rice and 2 c water in the insert.
- Pour 1/2 c of water in the pressure cooker pot, around the outside of the insert pot.
- Close pressure cooker, close valve, set to High Pressure, set to 10 minutes.
- When it beeps, allow 10 minutes for the cooker to release pressure naturally. At the end of 10 minutes, release any remaining pressure manually.
I love cooking with my pressure cooker, mine I brought form Mexico and was actually my moms so it is pretty old but works like a charm. I have not cooked rice though but I will try yoru recipe =)
You have one of the stovetop ones? I had one years ago, but didn’t use it much, and when the gasket went never replaced it.
Mine is electric, and I understand the timing may work out a little differently – the levels of pressure can be different – but I got the basic pot in pot idea from someone using a stovetop cooker, so the concept should work fine, it must might need a little tweaking.
I’d love to hear about it!
I have never used a pressure cooker to make rice before. My mom used to make everything in her pressure cooker!
I’m really just learning now how versatile it is! But as I said, this was need – there simply was no room unless something else went… I’m glad now, though, that I kept going!
I’m really interested in this – my Instant Pot does a terrible job with rice. I’ll give this technique a try, although I still really miss my rice cooker! It had the *perfect* rice sensor and always cooked any variety of rice – white, brown, long grain, short grain – perfectly. And always in under 30 minutes!
This isn’t an Instant Pot, but I hated the rice I made following the directions on mine – all soggy and mushy. I loved my rice cooker, which did have a brown rice setting (we eat exclusively brown rice, and most cookers made me jump through hoops to make it work right) but it did take an hour! (It *said* it took 50 minutes…. but it was an hour.)
Try it, and I hope it works well for you!
I use brown rice often so this is definitely some helpful information. I thought about getting a pressure cooker but haven’t done it yet. My daughter has one so I need to share this with her.
Oh, cool – try hers out! LOL
I’d sort of dithered over one for a while, and then was given this, so that got me moving… LOL I am gradually using it more and more.
I don’t have room for a rice cooker OR a pressure cooker in my kitchen, but this does make the pressure cooker seem more versatile and tempting! How clever!
I hear you – this was a stretch for us. (I didn’t mention it, but the coffee pot went away, too! I’m using a French Press, now, so it doesn’t need to sit on the counter when I’m not using it.) And I probably would not have done it if it wasn’t given to me – but now I’m glad I have it!
But it’s not worth it unless I use it 4-5 times a week – the rice tipped the balance, because we eat a lot of rice.
I still need to get an Instant Pot, am I the last one on the planet to own one? We love brown rice so this will absolutely come in handy when I do get my hands on an IP!
Well, since this isn’t an Instant Pot, but a regular electric pressure cooker (without many of the features) no, you’re not the last… LOL I’ve noticed, though, that the vast majority of cooking I’ve seen in the IP seems to just use the pressure cooker setting.
But I hope this is handy when you do get one!
Oh I don’t have a pressure cooker/instant pot either but but this makes me want to get one just cause I love rice so much and it seems so easy this way.
I was amazed how easy it is, once I got the method down… I love the electric pot, because I’m not glued to the stove. My tiny kitchen also doesn’t have anyplace to sit, so I’m always out in the living room listening to tell if something has come to a boil – which has brought on a few unfortunate boil overs or burned food over the years. I’ve become a big fan of set it and forget it!
I don’t have a pressure cooker but am always intrigued by them. I have a friend who swears by her pressure cooker, and it’s great that this rice only takes half an hour from start to finish!
Yeah, it’s when I realized how fast it really is that I was sold. Calculating that can be tricky – recipes only count the time under pressure, so I’ve learned that most recipes that tout “Only 10 minutes!” really take half an hour (like this one) once you add bringing the pot up to and down from pressure… But I made a point of timing this, and coming up to pressure consistently took under ten minutes, so… The pot in pot technique helps that.
l know how disappointing it can be when you expect great results from a recipe, but you end up throwing everything because the result was not great at all. It’s fantastic that you found a great way of cooking the brown rice, your method seems easy, l’m sure loads of people would just love it. I’m a big fan of rice of any kind, and l know that cooking it to perfection can be tricky unless you find the perfect way yourself. Amazing job!
Thanks – I was so frustrated the first few times! And glad I remembered reading about a different method… though even then, I tweaked it.
You’d think rice would be easy – so much of the world eats it every day – but it’s surprising how many ways you can cook it badly!
I never had a pressure cooker, until last year. I was totally freaked out about using them. I can remember horror stories from when I was a kid. Hubby decided I needed one…and it appeared in the kitchen. I will admit after experimenting with it, I am totally amazed how easy they are to use. Results are amazing as well. What a great way to cook rice…in record speed time.
The horror stories came from the old ones, decades ago, when it was possible to close one without latching it properly, or to (foolishly) open one too soon. But they’ve been building all kids of safety features into them for a while, now – the modern ones plain won’t work unless they are properly latched, and the lock so you can’t open them until pressure is down completely.
The newest have all kinds of neat features – so easy to use, I’m also amazed. I’m using this one more and more all the time. It will never take over the blog LOL but I will give more recipes for it, over the next while. It’s just too useful.
I have never use a a pressure cooker after leaving culinary school. After reading your recipe, I think I may have to consider getting one.
If you used one in culinary school, you probably really know more about it than I do! LOL But really, I love throwing things in the pot, setting it, and going out half an hour later to food that tastes long-simmered… with so little time and effort.
I lost the lid to my pressure cooker on our last move. So upset! I love brown rice but I hate that it takes forever to cook. Looks like it’s time to buy a new one!
I have to say I’ve become a fan of mine!
Oh, I so feel your pain! We live in a building too; it was built about 50 years ago, and even though the living room and dining room area are quite large in comparison to most Toronto buildings, our kitchen is smaller than my office at work. How sad it that? As mostly vegetarian-based recipes come to life in my kitchen, little to no counter space and storage causes much stress. I’ve learned to live without appliances because I just don’t have the room to keep them. I don’t own a microwave, or a slow cooker, or a rice cooker, etc. Everything is pretty much done by hand and from scratch.
LOL – the slow cooker lives on a shelf and gets put on the dining table (or even – carefully – on the stovetop!) to use! Though now that I use the pressure cooker for beans, too…
I find the appliances I use make it easier for me to cook everything from scratch – though I can certainly cook without them, did for years. It’s a balance, though – what makes sense for one person may not for another.
Rice in the pressure cooker is the best! When people as me why I love my pressure cooker so much, rice is my number one reason.
Terrific! It was the key, for me.
I’m not a huge fan of rice in the rice cooker because it always sticks to the bottom, so I wish I could give this version a try but I don’t have a pressure cooker in my apartment. My parents have one though, so I’ll definitely share this method with them!
Maybe you can try it there and see how you like it?
A tip, meanwhile… My current rice cooker doesn’t have the problem (one reason I love it and hesitated to put it away) but the previous one did. I found a method. I watched it the last five minutes or so of cooking, and when it stopped releasing steam through the vent, I’d turn it off, and let it rest another five minutes. (I’m usually in the kitchen around then, anyway, finishing up everything else…) If I did that, it didn’t stick.
See if that helps you!
We use our pressure cooker to cook literally in our Indian cuisine. In fact my pressure cooker never leaves the stove top. I use them to make rice, lentils, beans and also to steam stuff. I love my brown rice the best when cooked in pressure cooker, as the texture is just perfect. Lovely post for beginners.
When I first started reading food blogs, I found several from India, because of some specific recipes I was looking for. I was fascinated to find that almost everything seemed to be made in a pressure cooker – and of course realized how much sense it makes in the hot climate!
Thank you – I’m glad you found it a good beginner post – just what I wanted.
I LOVE the pressure cooker for pretty much everything, rice included. It seems to get a better texture than if I made it on the stove.
This is a great tutorial for it!
Thanks!
I like not having to watch it like a hawk to turn it off at the right moment… LOL