
Homemade Milk Kefir – Part 2
Kefir – easy and inexpensive to make, delicious, and loaded with probiotics to support health! It is particularly valuable for the elderly or ill.
The previous post, Milk Kefir – Getting Started, discussed the reasons you might want to make kefir, and, well, getting started. So now you are (mentally, at least) up to the point of having a jar on your counter which you devoutly hope is kefir, not just sour milk with some lumps in it…
As a rule of thumb, I expect a batch to take about 24 hours. But one reason I’d rather make this than yogurt is that it is forgiving… if you get to it late, that won’t hurt it. On the other hand, it requires the same flexibility from you… and a new batch, particularly, is apt to take a little longer (or maybe less…)
What does it look like? If you tip the jar, has it thickened, like buttermilk? Is it even holding together, like a soft yogurt? (Has it gone really firm, and started to separate? That’s overfermented, I’ll discuss it later – but still, its really fine, continue following these directions…) Sniff it – does it smell like yogurt or buttermilk? Good. If it’s still just milky, stir it to make sure the grains are distributed, and give it some more time.
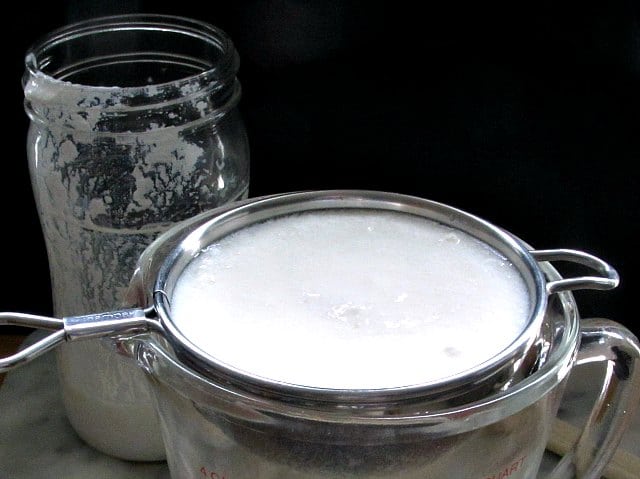
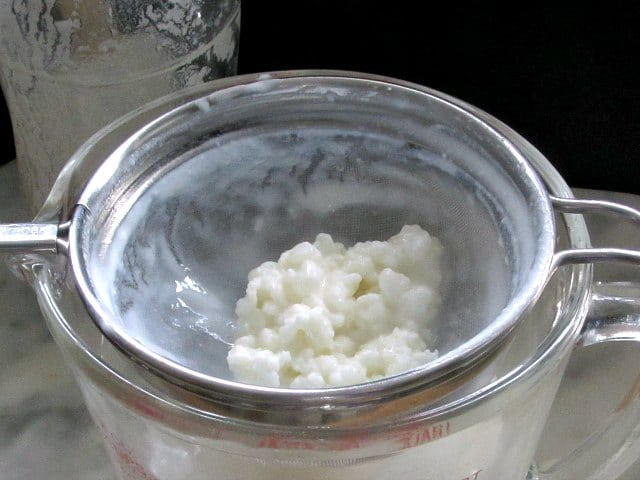
Now you need a fine non-reactive strainer – stainless steel or plastic – and something to stir with. I like a silicone spatula. Set it over a bowl or pitcher, and pour your kefir into it. Some liquid will drain right through, some needs to be gently urged… it depends a lot on how thick it is. As the liquid drains through, you’ll see little gel-like blobs staying in the strainer, which are the kefir grains you put into the milk. When I first did this I was sure I had to be gentle or I’d break them up, but they’re surprisingly firm and durable little things… Just keep stirring until the runny part is pretty much through the strainer, and you just have the grains left.
Now, just put the grains back in your jar (or in a clean one, but you can reuse if for a couple of days,) add milk, and start the next batch. And the liquid in your bowl or pitcher is your kefir. Congratulations!
I said, above that I would discuss overfermented kefir, as that is the most common issue. (Not even really a problem, but not always quite what you want…) The longer kefir ferments on the grains, the more probiotics it develops, which is good, but the more acidic it becomes, which is usually not so great. If it just keeps going, eventually it just becomes acid enough to kill the grains – but don’t worry, that takes quite a while… Meanwhile, it just may taste more sour than you like. And it may separate, which is disconcerting if you’ve never seen it before…
While I was working on this series, I had a batch overferment. I simply didn’t get to it one day, which can happen (and which is not really a problem – one reason I like to make kefir!) Back in our old apartment it used to happen more often because of temperature fluctuations. Here there is an HVAC system that Dad keeps pretty steady, and the kitchen gets very little sun, and between the two, it’s always pretty much the same in here.
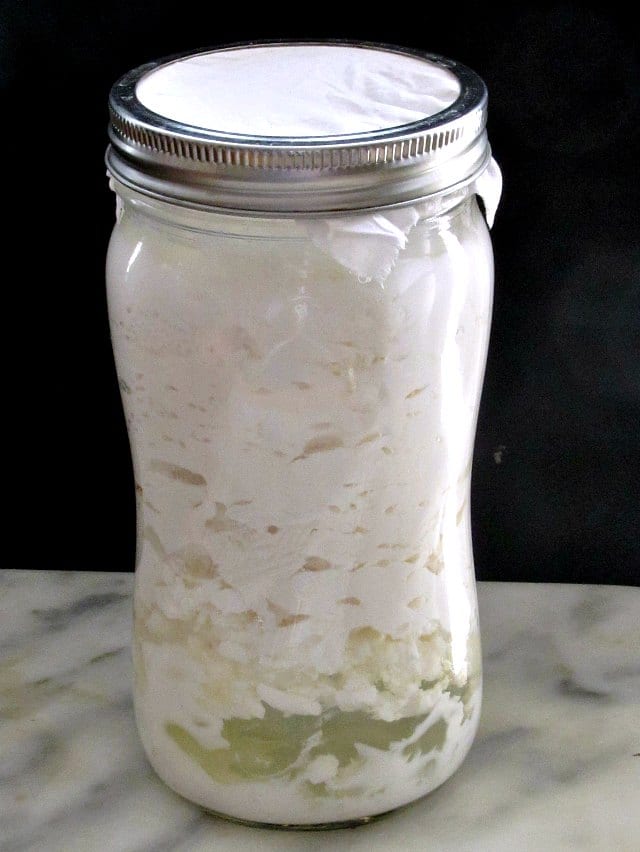
Anyhow, you see that you have a thick layer like sour cream, with whey at the bottom. If you just put it all into the strainer as usual, it will more or less combine – shake or stir to smooth it. I usually make sure I mix that batch with fruit or juice to balance the tart flavor. If you want to experiment, you can pour off the when, then strain the creamy stuff – you’ll be amazed how similar it is to sour cream! But it is perfectly usable.
Occasionally, especially if it has been sitting a while, you’ll notice the top is a slightly powdery white. That can either mean that it is drying out, or that you’ve acquired a bit of a harmless dairy mold. Either way, it is not in any way a problem. I usually sort of skim it off and discard that bit, though I understand that is optional – it doesn’t really affect the kefir.
If you ever seen colored mold – pink or green – discard the whole batch at once. That is very unusual, I have never seen it, but that is the only really possible Problem, so you should know about it.
And because of that, or (more likely) just dropping the jar on the floor, or other things that can happen, it’s a good idea to always keep some grains in the fridge. Just put them in a little sealed container, cover them with milk or cream, and they last for quite a while… I periodically put them in a blender shake and replace them with fresh grains, just to make sure they are healthy. (And if your kefir is going well, you will have more grains!)
The look of the grains doesn’t really tell you anything about their health. I had little tiny ones in New York that looked like small curd cottage cheese (and wondered what was wrong with them when people shared pictures of massive clumps!) but they worked fine and grew more grains regularly. Within a week of moving to North Carolina, they started to get bigger… I have no idea why. The result works the same and tastes the same – I don’t think it matters at all.
So now you have your delicious homemade kefir! The parents sometimes drink it with lunch (reminding each other of first having it when traveling in the Former Soviet Union, as they always say) and regularly put it over their cereal in the morning. I use it in protein smoothies I have for breakfast – and sometimes the ones I make them, as well. (Recipes will follow…) You can also use it to substitute for buttermilk in any recipe using that – heating it kills the probiotics (as it does in buttermilk or yogurt) but you still get the flavor.
Just one caution – start slow. The parents did not have any problems, I’m glad to say, but they don’t drink much at one time. Drinking a whole glass right off can cause digestive upset if your body is not used to it. I’m giving a recipe for one cup – I’d start drinking half a cup or less at a time and then build up. (I drink a cup and a half in my shake every morning without issues – once you’re accustomed to it, no problems.)
Enjoy it!

Homemade Milk Kefir – Part 2
Ingredients
- 1-2 T milk kefir grains
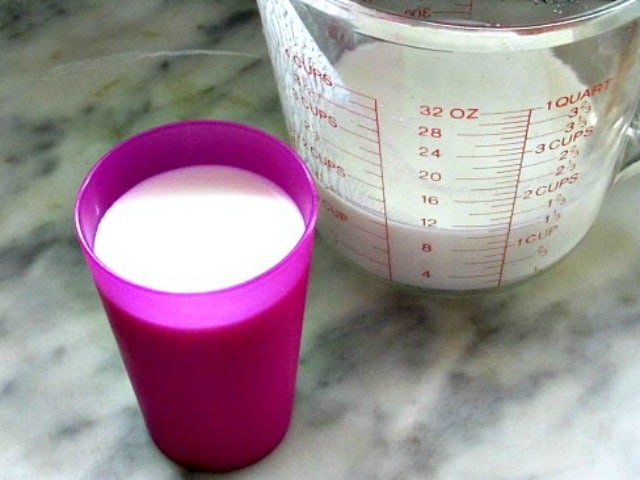
- 1 c whole milk
Instructions
- Put the grains and the milk in a non-reactive container you can wash easily - a glass jar usually works well.
- Cover with light fabric or a paper towel, held in place by a rubber band or something of the sort. You want air to go through but not dust or insects.
- Leave at room temperature for approximately 24 hours. Check to see if it is ready, give it a little more time if not.
- When the milk has thickened, strain it away from the grains. The grains may now be reused - the liquid is milk kefir.